This is the "before" picture of the lamp we are revamping.
These are the supplies you will need for this part of the project:
1. An old lamp
2. A cloth (make sure that you wipe down your lamp VERY well - get all the dust and grime off of it!)
3. A QUALITY spray paint primer. I ALWAYS use spray paint at Sherwin Williams. I have never had a problem with their paint chipping or looking dull or just not being the color I thought it was....
4. A QUALITY spray paint. I go for the more expensive one at Sherwin Williams (like $6.45 a can) but, I can get multiple projects out of one can. I revamped eight frames (large and small) out of one can of their spray paint... not bad. =)
In a well ventilated area (or garage), prime the base of your lamp. Make sure to cover everything. Then, let it sit for a while. The can says like 5 min... but, I always let it sit for at least 15, just to be sure it is dry so that I do not get runs.
Don't forget your little topper! (I almost did!)
When your primer is dry, go ahead and spray paint your top coat. My favorite color from Sherwin Williams is the Oil Rubbed Bronze... love that one... anyway, let it dry and if you need a second coat follow the directions on the can... every spray paint is different... I just prefer the Sherwin Williams brand.
This is the next part of your project - take off any decorations or old fabric off of your lamp shade.
Once you have all of the decorations or fabric off you will cut your fabric about the width of your shade. You should have about an inch or inch and a half of overhang on each side.
I used a very thin material because I wanted the "crinkly" look on my lamp - but you can use whatever you want to.
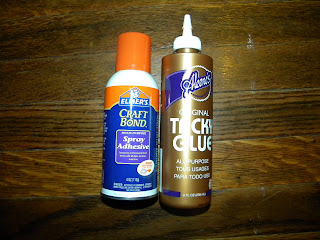
Now you will need your spray adhesive and fabric or tacky glue.
On the seam of your shade put tacky glue and then press your fabric on top of it. This will keep the fabric secure as you wrap the rest of the material around it.
Spray your adhesive on the shade AND on the fabric and then press them together. Be careful! If you are not wanting the crinkle look you will have to do it just a little at a time and smooth it out, otherwise you will have crinkles.
Keep doing that all the way around the shade.
When you get to the seam again, fold the fabric over and stick it down - this way you will get a finished look.
For my lamp I put all of my Rosettes around the seam so that you couldn't see it but, just in case someone does see the seam, it will have a flawless look.
Okay, I am sorry I forget to take a picture of when you fold the excess over the top and bottom of your shade. I will try to explain - if you have questions you can ask me on here or on facebook.... Okay. You will spray your adhesive little by little on the fabric and on the inside of the shade and then press it over the side and onto the inside of the shade. This gets VERY VERY VERY sticky so, your fingers will stick together for a while after you do it.... =D
Then you put all the Rosettes on your shade. Like I said I put them over the seam. =) Okay, you are all done! This project took me about two days to make... (I worked on it at nap times) Thanks for checking it out! =D


Amy~ this is beautiful and it looks so easy to do!! Thanks for sharing!! If I run into any old lamps I am so going to try this!! :)
ReplyDelete